
No products in the cart.
How to Clean Car Seats: Complete Guide for Every Material
by iverol
Every car owner knows that sinking feeling when you spot a mystery stain on your car seat. Maybe it's coffee from yesterday's commute, muddy paw prints from your furry friend, or something unidentifiable that your kids left behind. Your car's interior takes a beating every single day, and those seats bear the brunt of it all. But here's the truth: learning how to clean car seats isn't just about aesthetics. It's about protecting your investment, maintaining your vehicle's value, and creating a healthier environment for you and your passengers. Whether you're dealing with cloth, leather, or synthetic materials, the right cleaning approach can transform tired, stained seats back to showroom condition.
Understanding Your Car Seat Material
Before you grab any cleaning product, you need to know exactly what you're working with. Car seats come in several materials, and each one demands a different approach.
Cloth and fabric seats are the most common, typically found in economy and mid-range vehicles. They're forgiving and relatively easy to clean, but they're also magnets for stains and odors. Leather seats signal luxury but require gentle, specialized care to prevent cracking and fading. Vinyl and synthetic leather offer a middle ground with easier maintenance than genuine leather while still providing that premium look.
Check your owner's manual or look for tags underneath your seats. Some manufacturers include cleaning codes:
- W: Water-based cleaners only
- S: Solvent-based cleaners only
- W/S: Either water or solvent-based
- X: Vacuum only, no water
This simple step saves you from potentially damaging your upholstery with the wrong products.
Why Material Matters
I learned this lesson the hard way years ago. I used a harsh all-purpose cleaner on my leather seats, thinking "clean is clean." Within weeks, the leather started cracking. That expensive mistake taught me that proper cleaning techniques vary significantly by material.
Different materials have different porosity levels, pH sensitivities, and structural compositions. Leather is skin and needs conditioning. Fabric has fibers that trap dirt. Vinyl has a protective coating that can be stripped away. Understanding these differences transforms how to clean car seats from guesswork into science.
Essential Supplies for Every Seat Type
Having the right tools makes all the difference between a frustrating afternoon and a satisfying transformation. Here's what belongs in your car cleaning arsenal:
Basic Cleaning Kit
| Item | Purpose | Best For |
|---|---|---|
| Vacuum with attachments | Remove loose dirt and debris | All seat types |
| Soft-bristle brush | Agitate cleaning solution | Fabric seats |
| Microfiber cloths | Apply cleaners, buff surfaces | All seat types |
| Spray bottles | Dilute and apply solutions | All seat types |
| Bucket | Mix cleaning solutions | Fabric seats |
Fabric Seat Cleaners
- Upholstery shampoo or dedicated fabric cleaner
- Baking soda for odor absorption
- White vinegar for natural cleaning power
- Steam cleaner (optional but highly effective)
Leather Seat Care
- pH-balanced leather cleaner
- Leather conditioner
- Soft sponge or applicator pad
- Cotton swabs for seams and stitching
You don't need to break the bank. Many effective solutions start with common household items, though investing in quality car care products designed specifically for automotive use delivers superior results and better protection.
How to Clean Fabric Car Seats Step by Step
Fabric seats are workhorses, but they show every spill and stain. Here's the systematic approach that actually works.
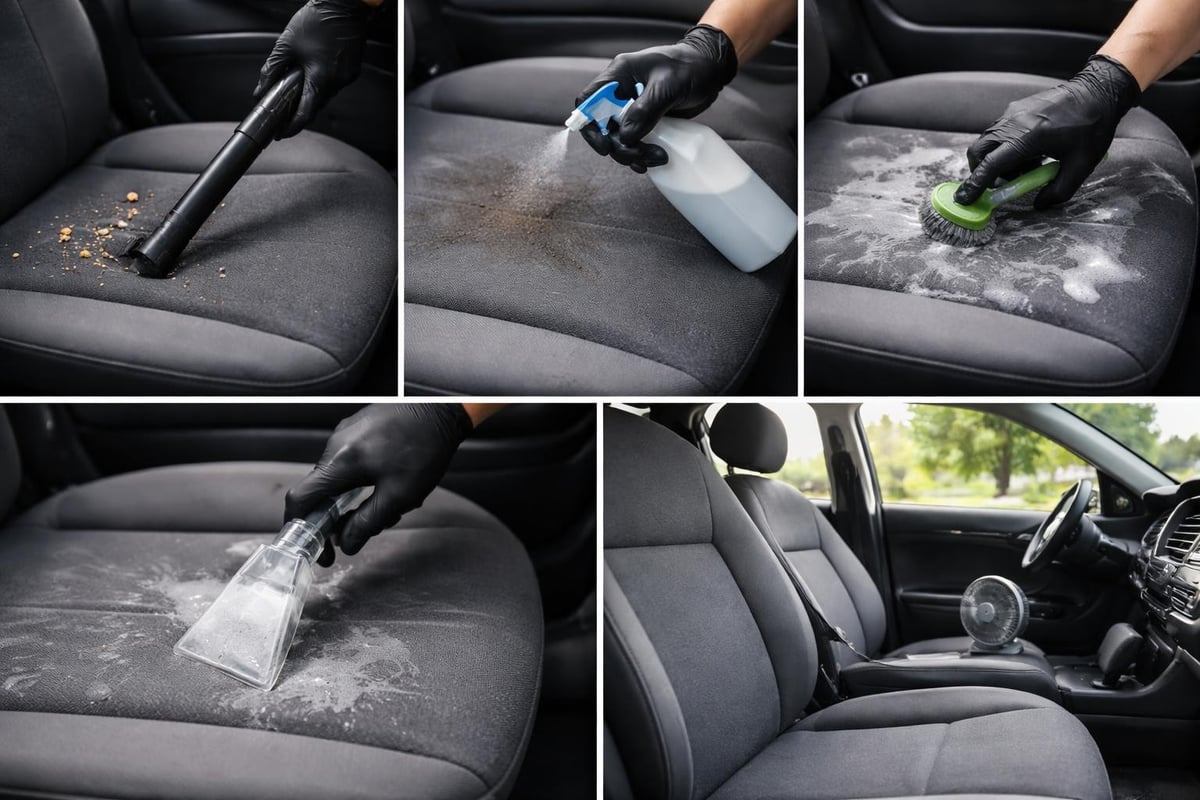
Step 1: Vacuum Thoroughly
Start with a complete vacuum, getting into every crevice. Use the crevice tool for seams and the brush attachment for the seat surface. You'd be amazed what hides in those gaps-crumbs, dirt, pet hair, and debris that would turn into mud once you add moisture.
Step 2: Treat Stains First
Don't just clean everything at once. Spot-treat stains before your general cleaning. Baking soda works remarkably well for many common stains. Make a paste with water, apply it to the stain, let it sit for 30 minutes, then vacuum it up.
For tougher stains:
- Mix equal parts white vinegar and water
- Spray directly on the stain
- Let it sit for 5-10 minutes
- Blot with a clean cloth (never rub)
- Repeat if necessary
Step 3: Apply Your Cleaning Solution
Mix your upholstery cleaner according to directions. Work in sections, spraying the solution onto the fabric. Use your soft-bristle brush in circular motions to work the cleaner into the fibers. The key here is consistency-don't saturate one area while barely touching another.
Step 4: Extract and Rinse
This is where many people go wrong. You must remove the cleaning solution and the dirt it's loosened. Use clean, damp microfiber cloths to blot the seats. Change cloths frequently as they become dirty. If you have a wet/dry vacuum or extractor, even better-these pull moisture and dirt from deep within the fabric.
The Drying Process
Never skip proper drying. Leave windows or doors open, run the air conditioning, or use fans. Damp seats breed mold and mildew, creating health hazards and awful smells. Plan your cleaning for a warm, sunny day when you can leave windows cracked for several hours.
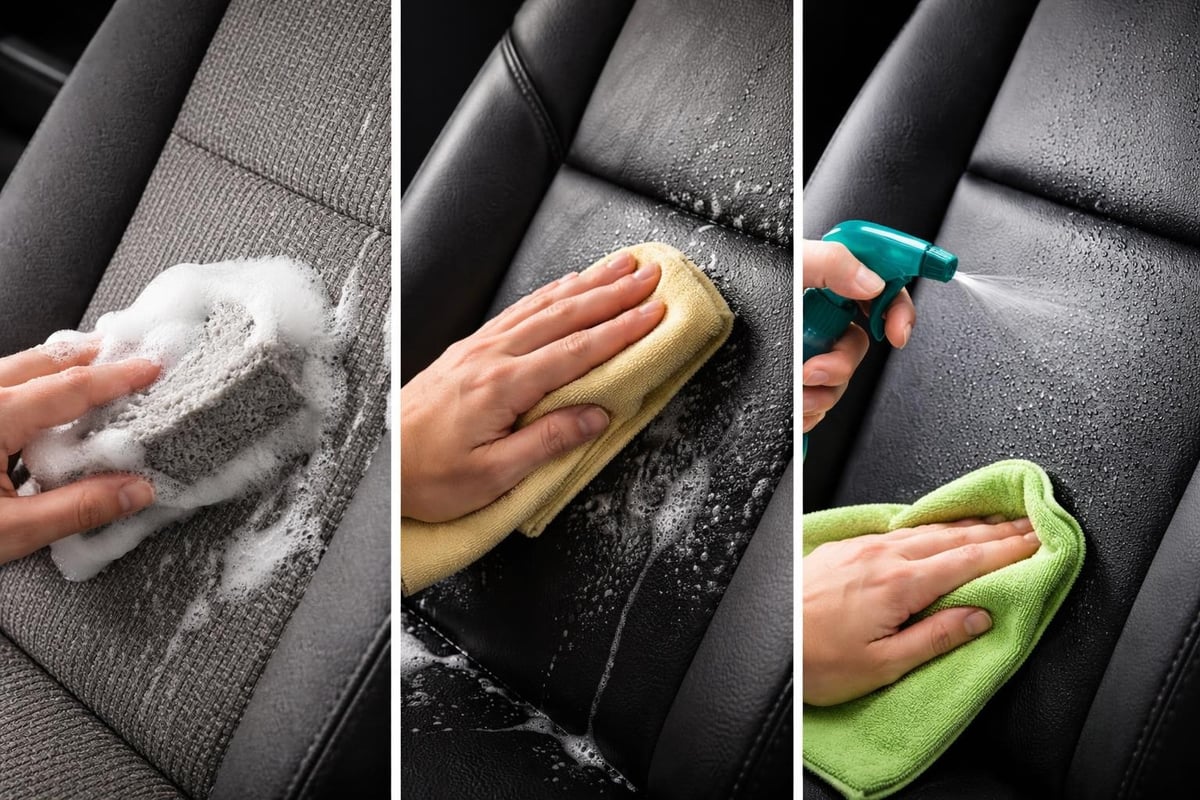
Cleaning Leather Seats the Right Way
Leather demands respect and gentleness. It's not just cleaned-it's cared for. The process differs significantly from fabric because you're working with a natural material that can dry out, crack, or fade.
Pre-Cleaning Preparation
Start with vacuuming to remove loose particles that could scratch the leather during cleaning. Use a soft brush attachment and gentle pressure. Check for any existing damage like cracks or tears-these need special attention to prevent worsening.
The Cleaning Process
Mix your leather cleaner (never use household cleaners on leather). Dampen a microfiber cloth with the solution-not dripping wet, just damp. Wipe the seats in sections using gentle, circular motions. For perforated leather, be extra careful not to force water into the holes.
Professional detailers emphasize the importance of proper leather care techniques that preserve the material's integrity while removing dirt and oils. Cotton swabs work perfectly for cleaning the stitching and seams where dirt accumulates.
Conditioning Is Non-Negotiable
Here's what separates amateur cleaning from professional results: conditioning. After cleaning and drying, apply a quality leather conditioner. This replaces the natural oils that cleaning removes, keeping leather supple and preventing cracks.
Apply conditioner with a clean microfiber cloth, working it into the leather in circular motions. Let it absorb for the recommended time (usually 15-30 minutes), then buff away any excess. Your seats should feel soft, not greasy.
Tackling Common Car Seat Challenges
Real life creates real messes. Let's address the situations that send people searching for how to clean car seats at midnight.
Pet Hair Removal
Pet owners know this struggle intimately. Regular vacuuming helps, but for embedded hair, try these tricks:
- Put on rubber gloves and rub the seats in one direction
- Use a squeegee with light pressure
- Spray fabric lightly with water first to clump the hair
- Invest in a specialized pet hair vacuum attachment
Odor Elimination
Stains you can see, but odors? They hide deep in the foam and fibers. Baking soda is your best friend here. Sprinkle it generously over fabric seats, let it sit overnight, then vacuum thoroughly. For leather, ensure seats are completely dry, as moisture causes musty smells.
For persistent odors:
- Check for hidden sources (spills that soaked into carpet or foam)
- Use an enzyme cleaner designed for automotive use
- Consider an ozone treatment for severe cases
- Never mask odors with air fresheners-eliminate the source
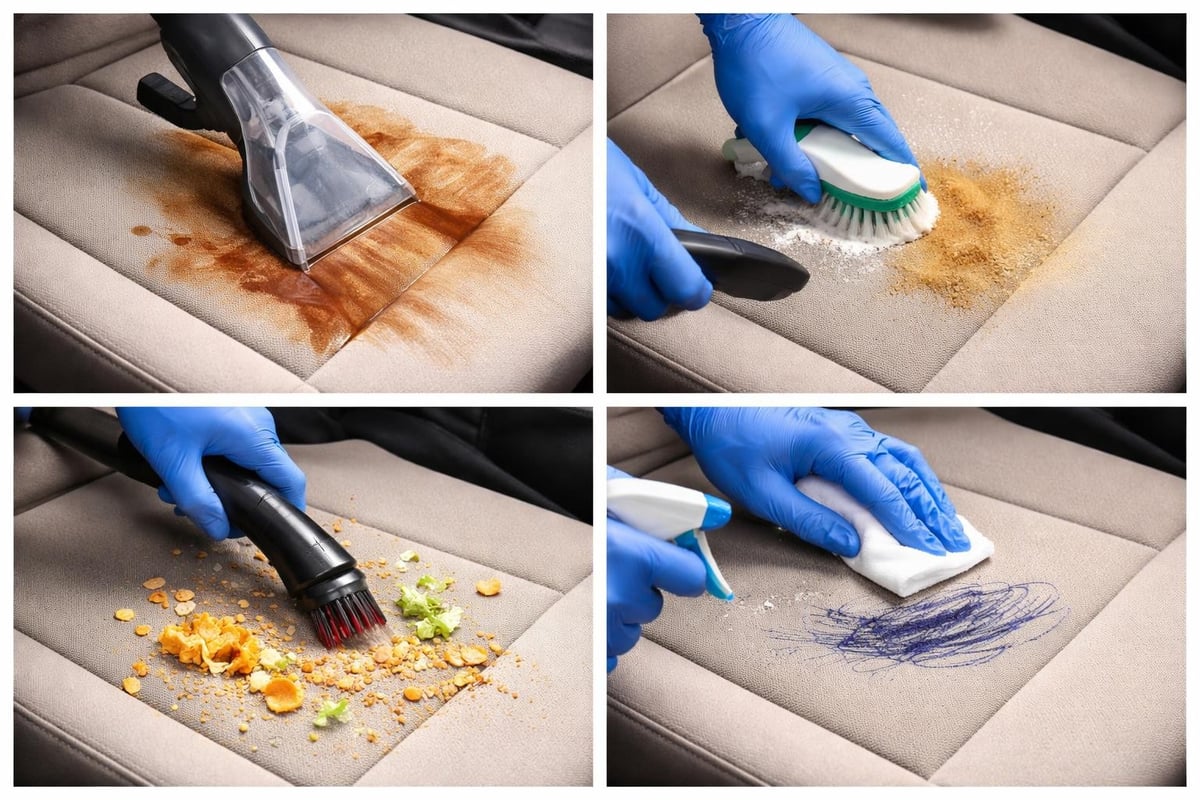
Food and Drink Spills
Act fast. The longer a spill sits, the harder it becomes to remove. Blot immediately with paper towels or a clean cloth. Never rub, which pushes the spill deeper into the material.
| Spill Type | Immediate Action | Follow-up Treatment |
|---|---|---|
| Coffee | Blot, apply cold water | Vinegar solution |
| Soda | Blot, rinse with water | Upholstery cleaner |
| Grease | Apply cornstarch | Degreaser |
| Ink | Rubbing alcohol on cloth | Leather cleaner |
Maintenance Strategies for Long-Term Results
Knowing how to clean car seats is valuable, but preventing them from getting filthy in the first place? That's wisdom. Regular maintenance keeps your vehicle looking newer longer.
Weekly Quick Maintenance
Spend five minutes each week with these simple tasks:
- Vacuum seats and floor mats
- Wipe down surfaces with a damp cloth
- Check for new stains and treat immediately
- Shake out floor mats
Monthly Deep Attention
Once a month, go deeper. Vacuum thoroughly, spot-clean any stains that appeared, condition leather if applicable, and inspect for wear or damage. This prevents small issues from becoming major problems.
Protective Measures
Prevention beats cleaning every time. Consider these protective strategies:
- Use seat covers during messy activities
- Keep cleaning wipes in the car for immediate spill response
- Apply fabric protector after deep cleaning
- Use leather UV protectant to prevent fading
- Enforce a no-food policy (okay, that's aspirational)
Professional vs. DIY Cleaning
Sometimes you need to call in the experts, and that's perfectly fine. Professional detailing makes sense when you're preparing to sell your vehicle, dealing with severe damage, or simply lack the time and tools.
When DIY Works Best
- Regular maintenance cleaning
- Fresh, surface-level stains
- General dirt and dust accumulation
- Minor odor issues
- When you have the right products and time
When to Go Professional
- Deep-set stains that resist home treatment
- Mold or mildew growth
- Severe pet damage or odors
- Preparation for vehicle sale
- Restoration of neglected interiors
The investment in proper automotive care accessories pays dividends over time. Quality tools and products from specialized providers deliver results that protect your investment and maintain your vehicle's value.
Seasonal Cleaning Considerations
Car seat cleaning needs change throughout the year. Smart car owners adjust their approach with the seasons.
Spring and Summer bring pollen, sunscreen, and melted ice cream. Focus on UV protection for leather and frequent vacuuming to combat pollen accumulation. Open windows during cleaning for faster drying.
Fall introduces wet leaves, muddy shoes, and back-to-school chaos. Waterproof floor mats become essential, and you'll need more frequent spot cleaning as rain and mud track inside.
Winter presents unique challenges with salt, moisture, and heating system dust. Salt stains require immediate attention before they set. Allow extra drying time since cold air holds less moisture. Watch for mold growth from wet clothing and snow.
Climate-Specific Tips
Hot, dry climates: Leather dries out faster-condition monthly. Use sunshades to prevent fading and cracking.
Humid climates: Moisture breeds mold. Ensure complete drying after cleaning. Consider desiccant packets under seats.
Cold climates: Cleaning in winter requires indoor space or professional help. Focus on prevention and spot treatment until warmer weather arrives.
Safety and Health Considerations
Your car's interior affects your health more than you might realize. The average person spends hours weekly in their vehicle, breathing whatever's been released from the seats and surfaces.
Avoiding Harsh Chemicals
Many commercial cleaners contain chemicals that off-gas in the enclosed environment of your car. Look for:
- Low-VOC or VOC-free formulas
- Plant-based ingredients
- Fragrance-free options
- pH-balanced solutions
Always ventilate during and after cleaning. Open all doors and windows, run the ventilation system on fresh air mode, and allow several hours for any fumes to dissipate before driving with windows closed.
Allergy and Sensitivity Concerns
If you or your passengers have allergies or chemical sensitivities, stick with gentle, natural cleaning solutions. White vinegar, baking soda, and mild soap often work as well as commercial products without the irritants.
Test any new product in an inconspicuous area first-under the seat or on a lower corner. Wait 24 hours and check for discoloration, damage, or reactions before using it on visible areas.
Special Situations and Advanced Techniques
Sometimes standard cleaning isn't enough. Here's how to handle those special situations that require extra knowledge.
Removing Set-In Stains
That mystery stain that's been there since you bought the car? It's not hopeless. Create a paste with hydrogen peroxide and baking soda for fabric seats. Apply it to the stain, cover with plastic wrap, and let it sit for several hours or overnight. The peroxide breaks down organic stains while the baking soda absorbs odors.
For leather, use a specialized leather stain remover, but test it first. Some stains may have penetrated too deeply to remove without professional help or re-dyeing.
Dealing with Cigarette Smoke
Smoke residue requires multiple cleaning sessions. Start with thorough vacuuming, then clean all surfaces with a mixture of white vinegar and water. Sprinkle baking soda on fabric seats, leave overnight, and vacuum. Repeat this process several times over weeks. Comprehensive interior cleaning addresses every surface, not just seats.
Replace cabin air filters-they hold smoke particles. Consider an ozone treatment from professionals for severe cases, but understand this requires leaving the vehicle unoccupied for safety.
Restoration Projects
Buying a used car with neglected seats? Restoration takes patience but delivers incredible results. Start with the gentlest cleaning method and escalate as needed. You might need:
- Initial deep vacuuming and debris removal
- Multiple rounds of cleaning to lift accumulated grime
- Stain treatment sessions
- Conditioning and protection application
- Professional help for tears, burns, or severe damage
Document the process with before-and-after photos. The transformation can be stunning and significantly increases your vehicle's value and enjoyment.
Maintaining clean car seats doesn't require professional expertise, just the right knowledge and consistent effort. By understanding your seat material, using appropriate cleaning methods, and staying on top of regular maintenance, you can keep your vehicle's interior looking fresh and inviting for years to come. Whether you're tackling daily dirt or restoring neglected upholstery, Iverol LLC offers the quality car care solutions and automotive accessories you need to protect your investment and enjoy a cleaner, healthier driving environment.
Further reading

Leave a comment